The Problem with Dirt
Addressing product quality issues in mills often employs a reactive approach as we need to go from a slurry to a dry form for many tests. Problems could be from any number of places in the process, with some samples in a condition ready to test while others require preparing handsheets. However, this means that there is some element of time working against us when operations aren’t going right. This can hamper troubleshooting as trying to identify where the problem is occurring often is a significant time sink before we can determine how to resolve the issue.
When a quality problem arises, crews begin making process adjustments based on available information from experience or troubleshooting guides. Sometimes we get lucky, and it provides a quick fix to mitigate off-quality products; other times, efforts might muddy things. So, we’re continuing to look for ways to address dirt issues and estimate the potential quality impact to minimize product loss.
Luckily, technology continues to evolve, enabling applications not possible before. For example, new technology in mills today utilizes a fast, high-end optics system that measures dirt particles and other impurities in the pulp slurry without requiring the “wait time” for something to come off the reel or to make handsheets. This technology is called DotEye®, a module of the PulpEye® system.
A Bit of History on Dirt
Manual laboratory tests to measure dirt utilize an equivalent black area, EBA, to report the sample’s parts per million (PPM) value. Depending on the final product, too high of a value is cause for rejection by most manufacturers as the appearance of these contaminants is detrimental to their customers. For example, most virgin fiber pulp producers have targets of ≤ 4 PPM. That’s equivalent to the amount of fluoride you might find in your drinking water! So, it’s a minimal amount that generally is acceptable.
Traditionally, testing for dirt was done visually by a lab tech. After preparing a sample, a visual comparison would be made to a reference standard and then reported what could be inferred by the results. With the advent of optical scanning technology, this process was computerized to speed up reporting results and to improve accuracy over the lab tech using a combination of transmitted or reflected light. However, it still could only be done for finished products or handsheets.
Typically, pulp measurements would be done with transmitted or reflected light, while paper substrates generally used reflected light. A primary reason for this difference is that reflected light is suitable for measuring surface impurities, while transmitted light measures embedded dirt.
So naturally, with this computerized measurement capability, various solutions were developed around supporting data collection to reduce the amount of time it takes to get results. But again, for all this advancement, we still had to employ additional methods if we wanted to measure dirt within the pulp slurry, where the problem usually presents itself.
Efforts to Identify Dirt
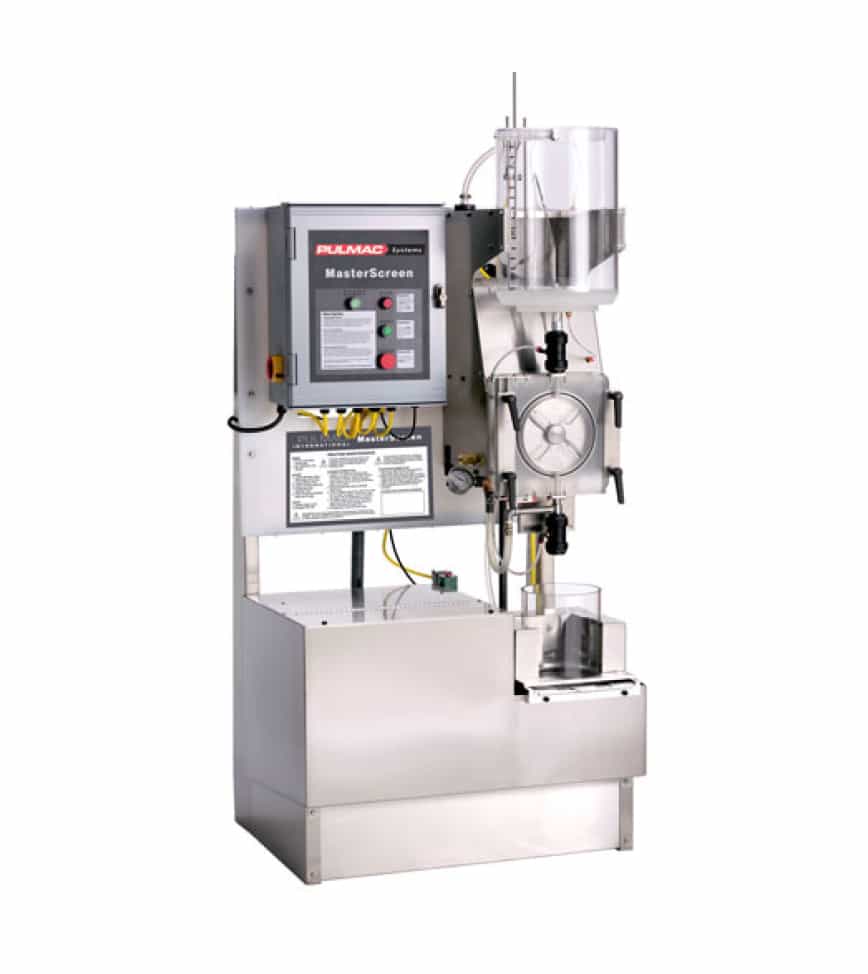
Laboratory equipment was developed to speed up making handsheets and identifying contaminants and other products to measure the amount. Pulmac’s MasterScreen™ continues to be the preferred handsheet method because of its quick mechanical ability to separate fibers from contaminants in pulp slurries taken from anywhere in the process and freeing up technician time to perform other duties.
MasterScreen
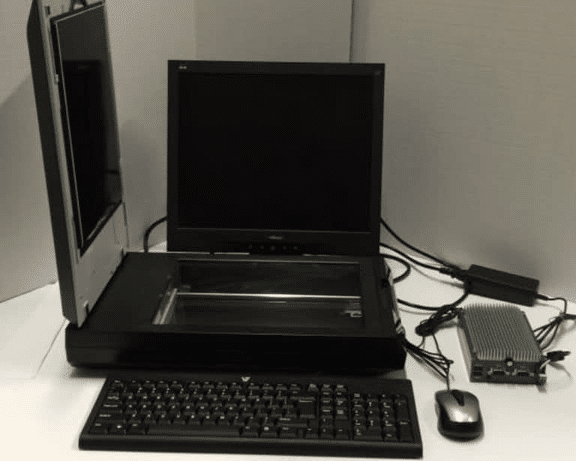
DirtScan 200E™
With contaminants now isolated for review, technicians could then employ visual test procedures, like those available from TAPPI or ISO, or take advantage of computerized methods, like Pulmac’s DirtScan 200E™, to perform the analysis and document the results for operations, again freeing up technician time to perform other duties.
Other solutions today focus on the operational floor and where measurements could easily be obtained from the product. In addition, solutions are available for off-machine testing utilizing robotics and automation to scan the entire sheet.
There are on-machine solutions as well. Some utilize a scanner head mounted on the CD scanner or a combination of fixed cameras to image as much of the moving web as possible before the reel. These solutions dramatically increase the volume of contaminant data obtainable versus laboratory methods; however, they are a more reactive approach to the issue since the cause of the contamination likely is much further back in the process.
Overall, we have not been able to obtain timely contaminant information in pulp slurries until recently.
DotEye®: Online Measurement of Dirt in Pulp Slurries
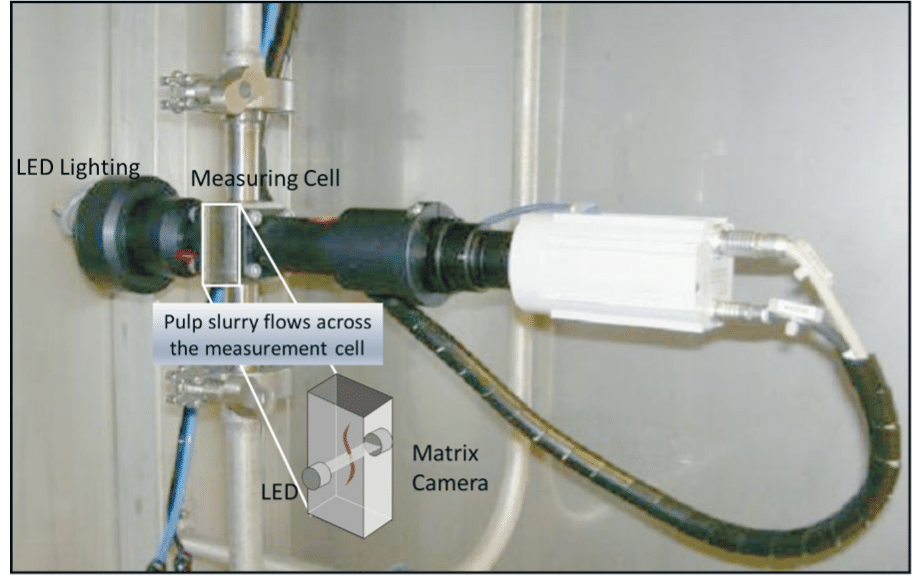
DotEye is an online pulp dirt counting and classification module working according to TAPPI/ISO standards. It is housed within a PulpEye® cabinet enabling placement in various locations throughout the process or integrated with automatic sampling so that multiple sample points can be tested with one unit.
This is a significant step forward:
- in overall time savings to get results, particularly when troubleshooting
- testing closer to where the problem is occurring
- enabling greater frequency to test and monitor operations
- increasing awareness of process drifts and upsets
- moving to be more proactive versus reactive to minimize the effect on the end-product and reduce the risk of generating off-quality tons
The dirt measuring cell utilizes two light sources to assess the level of contamination:
- a Xenon flash for reflected light (i.e., potential surface problems)
- and a LED lamp for transmitted light (i.e., embedded contaminants)
Versus Traditional Methods
Versus traditional methods, the human eye’s sensitivity is roughly 40 – 80 microns (mostly age-dependent) and where a lot of reported result variability can occur while camera resolution can be selected as desired. Typically, the system camera resolution set is 35 microns, chosen so that all visible specks are measured (goodbye eyestrain!).
The additional benefit of now being able to examine the pulp slurry so easily is the time savings, reported every 3 minutes with proper setup. That’s over 75% improvement from sample collection to results versus other methods.
The ability to test more frequently, capturing the images and data for review, enables improved monitoring and an awareness of potential performance drift to act proactively, mitigating the impact on end-product quality. Also, being able to test more pulp sample locations more frequently allow an understanding of contaminant removal profile changes to support troubleshooting efforts and identify a solution when problems occur.
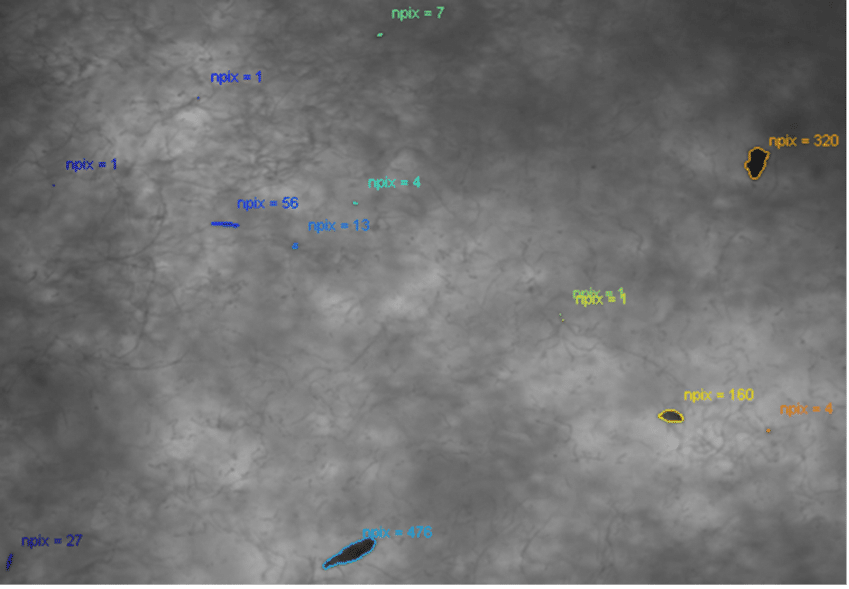
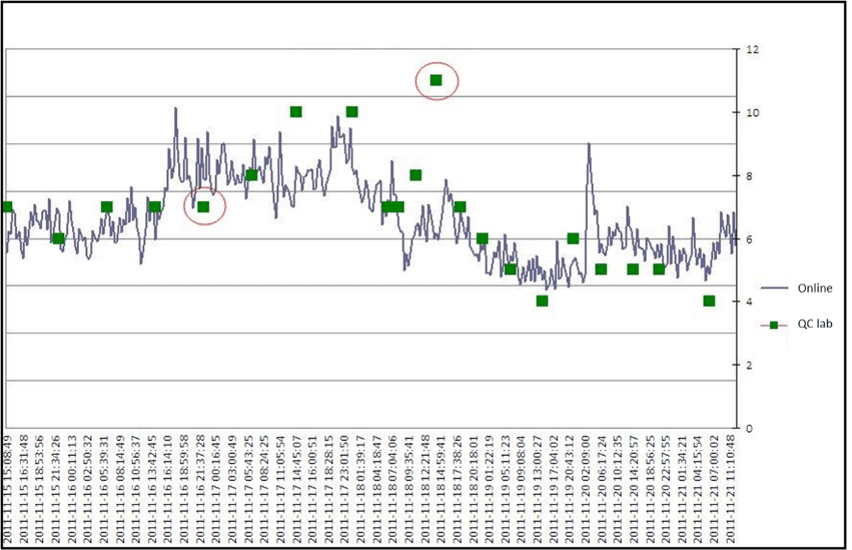
An example of the high-resolution images captured and a comparison of some of the data generated from the system versus normal laboratory testing results are provided below. The image clearly shows the different sizes and shapes of contaminants within the pulp slurry. Overall, reviewing the data from the system versus the lab, the results largely agree.
However, the data from DotEye demonstrates a level of process variation that the lab testing alone would not reflect well. Much of the variation and process excursions are completely missed from lab testing alone. The lab data also raises general questions about reporting accuracy versus online measurements. Questions include items such as:
- Could some results have been misreported when the sample was taken? Are results consistently reported as when the sample is taken or when the test was performed? Could the technician have been retasked or had a modified schedule for when the test would typically be performed? (first, circled data point)
- Was this data point an outlier? Was there a sampling problem? Was the technician tired? (second, circled data point)
- How is the technician reporting the results? (successive, repetitive values not always aligned with the online measurement)
These questions and aspects of data collection are always essential factors to rule out when deciding what corrective action to take. But, again, with the proper setup of the DotEye system, a larger dataset is available to support those decisions without needing to wait for the collection and preparing another sample for confirmation of an issue.
In Summary
Advances have continued to be made to reduce the time required to measure dirt. More recently, new options are available to measure these contaminants in the pulp slurry without requiring effort to produce handsheets to test. As operators are given these additional monitoring tools, earlier corrective actions can be taken to mitigate process upsets and off-quality tonnage.
Download Daves Presentation From PEERS 2022 – How to Detect Dirt and Shives in Pulp Slurries.

